


Small Win #16: The cheapest way to improve your gut health
Just 2 ingredients + 30 minutes of your time

Welcome to Small Wins, a newsletter that shares a small win with you every other week — one that has the power to improve your cooking, your home, your life. It’s great to have you here!
I had other plans for this week’s small win, but then my reel about sauerkraut went viral on Instagram (1 MILLION views and counting!) — so maybe you’d all like this information, too?
Plenty of people will try to sell you fancy (and expensive) probiotics but an easier, cheaper way to improve your gut health is to simply add something fermented to your plate — a bit of kimchi, a spoonful of live yoghurt, some sauerkraut.
For several months I was buying jars of sauerkraut from the supermarket but:
A lot of the products on the market are pasteurised, which kills all the beneficial bacteria
It was getting expensive!
Then I discovered that I could make well over a kilo of the stuff for the same money as a small jar of unpasteurised, organic sauerkraut: game-changer!
At its simplest, sauerkraut is just cabbage + salt + time, and so long as you observe good ‘sauerkraut hygiene’ it will last in the fridge for at least 2 to 3 months.
My mum’s motto has always been ‘make the healthy choice the easy choice’ and having homemade sauerkraut in the fridge at all times — so that you can add a spoonful to the side of your plate — is the definition of an easy win for your health.
Love,
Alexina
Coming up on Small Wins — Two things you must do with blood oranges. The forgotten pancake. The easiest and quickest homemade "bread" in the world.
For my Small Wins+ community — This month we did a deep-dive into vegetarian cooking: the key concepts and tips that will help you to produce delicious vegetarian meals and some of the best vegetarian recipes. For February, it’s all about cooking for the one you love! On 8th Feb, expect 2 date-night menus to land in your inbox: a cosy autumn/winter one and a flirty spring/summer one. Become a paid subscriber to gain access.
3 WAYS TO MAKE THE HEALTHY CHOICE THE EASY CHOICE
Feel free to skip down to the sauerkraut-making but whilst we’re talking about easy wins for our health, here are 3 simple changes that have made a meaningful difference in my life.
1 - KEEP SOMETHING FERMENTED IN THE FRIDGE

Think sauerkraut, kimchi, live yoghurt etc.
Adding a spoonful to the side of your meals is an effortless way to improve your gut health. I like yoghurt on the side of a dahl, kimchi with egg-fried rice and sauerkraut alongside grilled mackerel or a pork chop.
Whatever product you buy has to be unpasteurised, to ensure that the good bacteria is still live — brands that produce unpasteurised ferments in the U.K. include Vadasz, RAW Health, Hurly Burly and the London Fermentary.
Your cheapest option, though, is to make your own.
2 - CONSIDER A VEG BOX
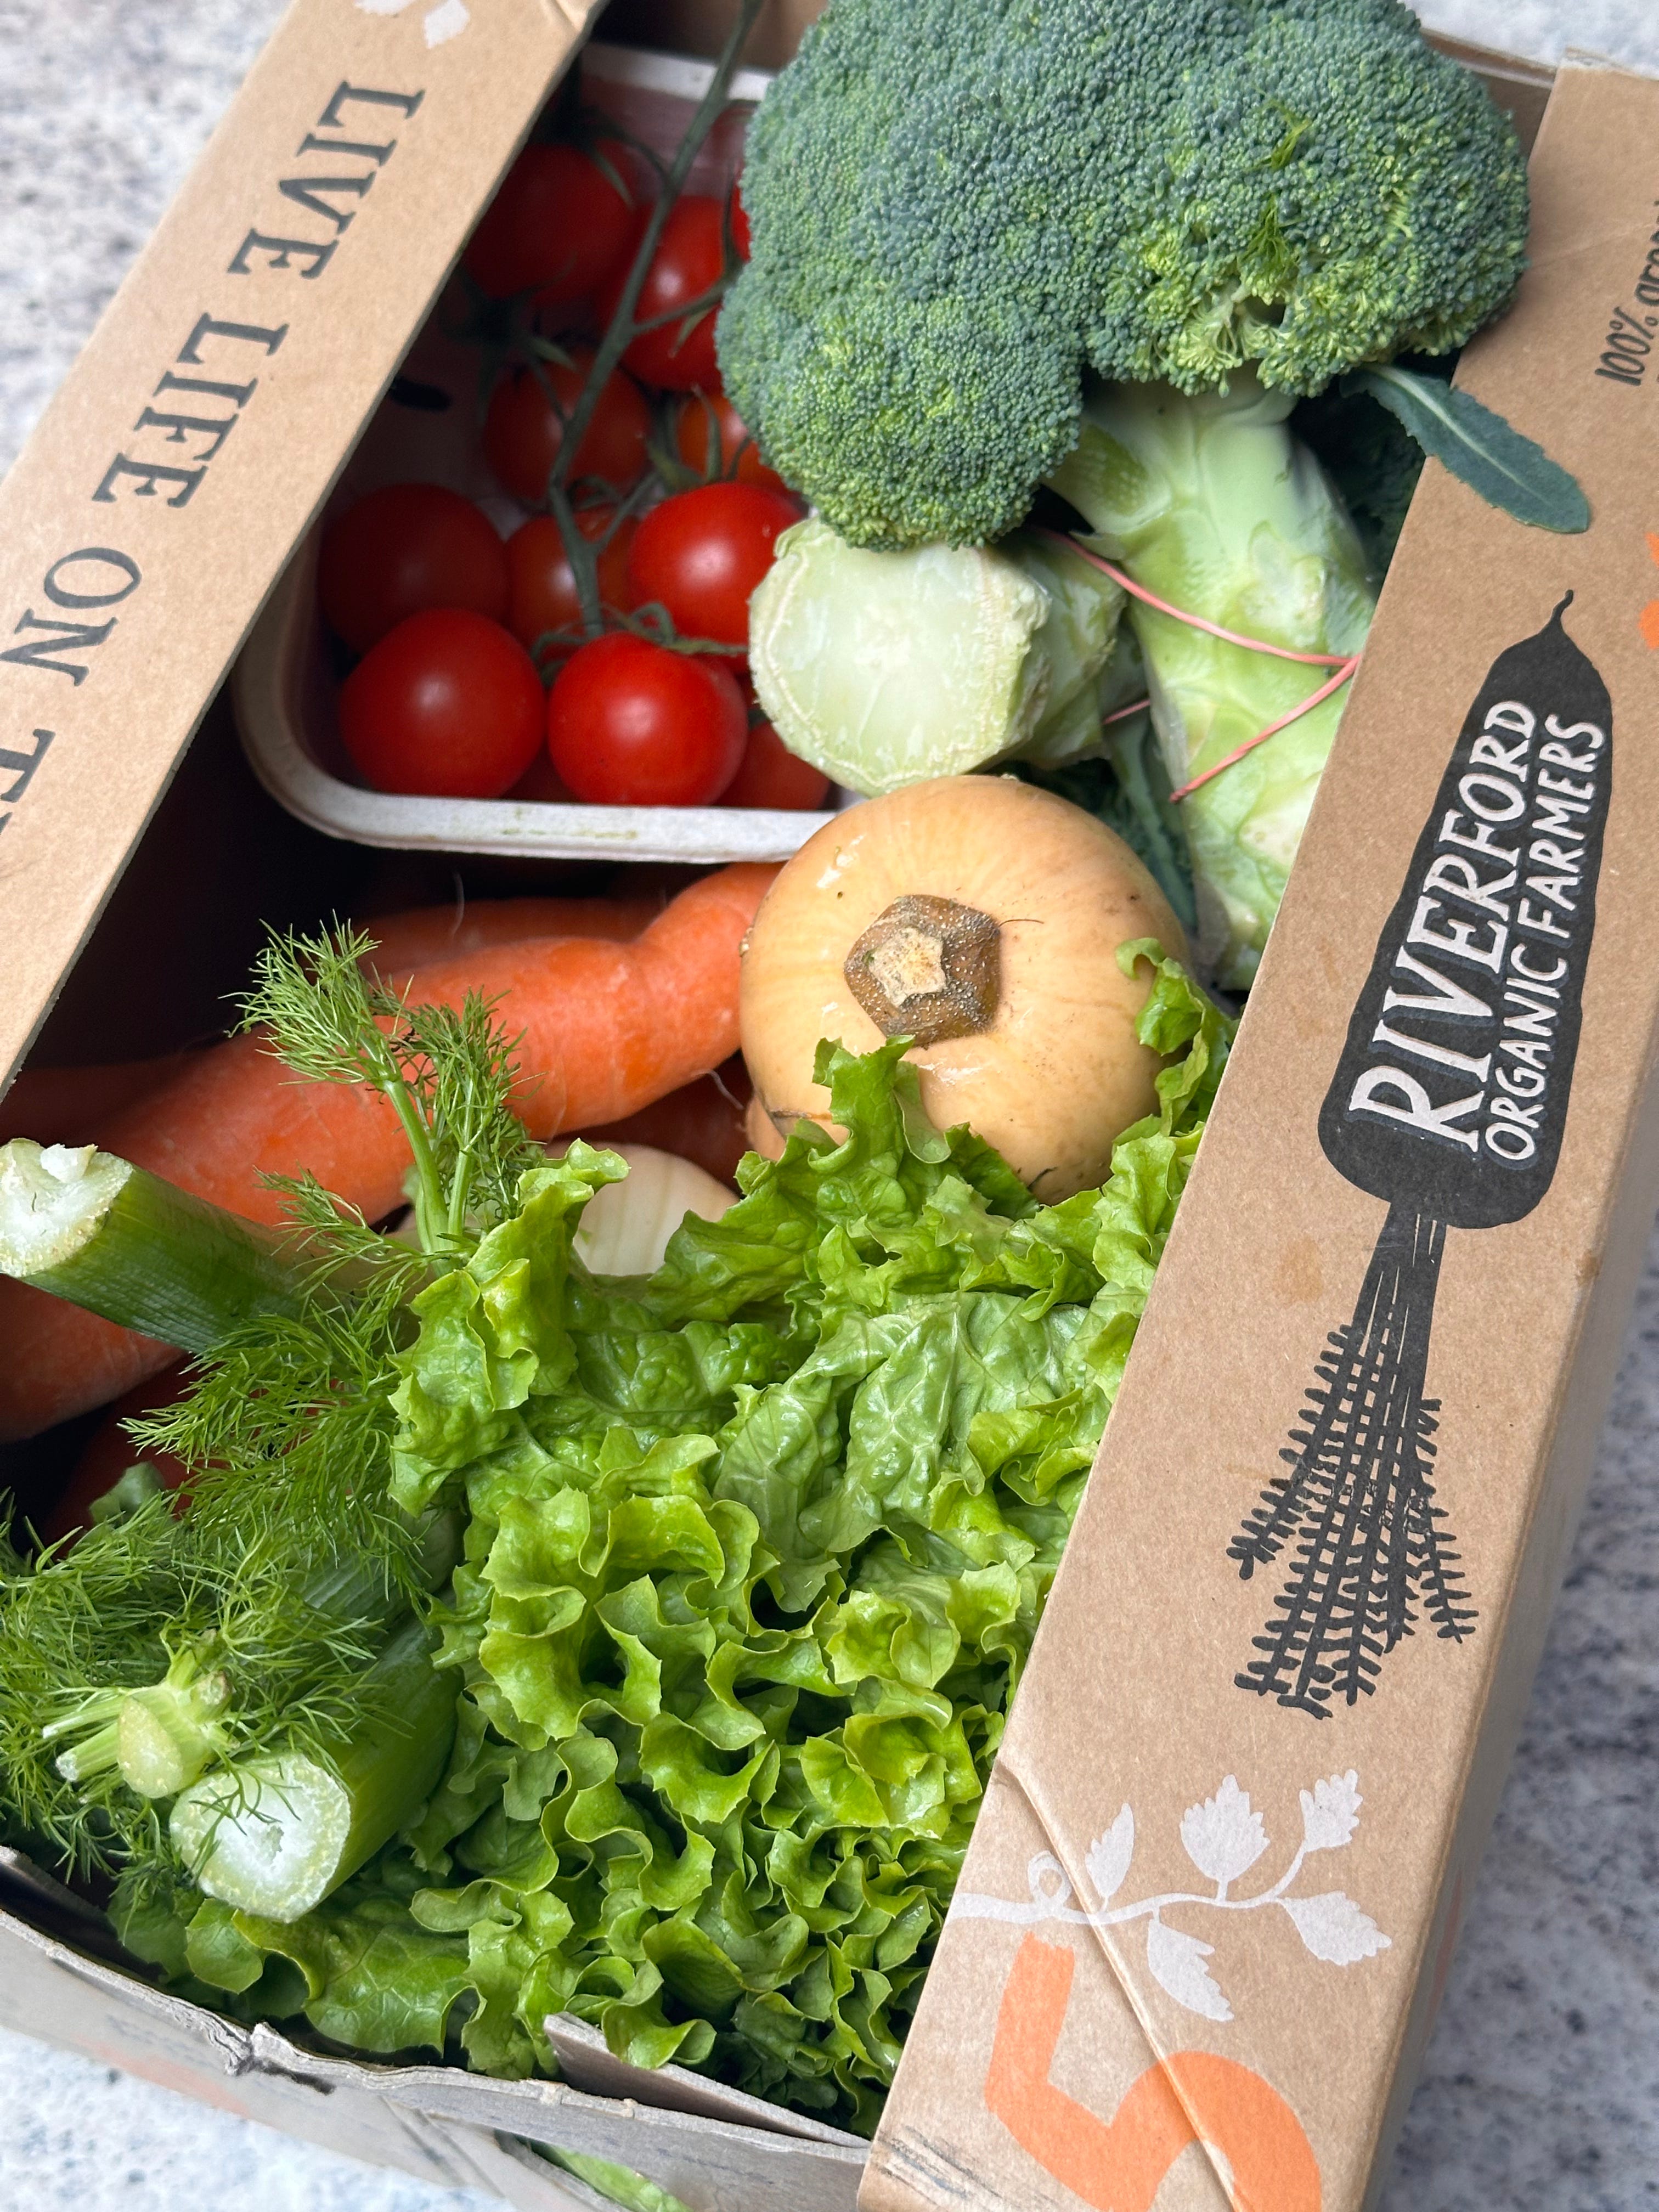
Emphatically not an ad, but getting a Riverford box every fortnight for the last couple of years has made a difference to the variety of veg that I eat. Here’s why I love it:
Convenicen — the box gets delivered straight to your doorstep and you can pick a frequency that works best for you (I like fortnightly)
Variety — Before Riverford I would end up buying the same 3 vegetables again and again (just me?!). Now I get different ve every week
Minimal packaging — Better for you and better for the planet
Freshness — The veg is fresher so it lasts longer than the stuff from the supermarket (and is probably more nutritious as a result)
If health and/or the planet are key considerations for you, a veg box is worth a try.
3 — READY-TO-GO SALAD-Y BITS
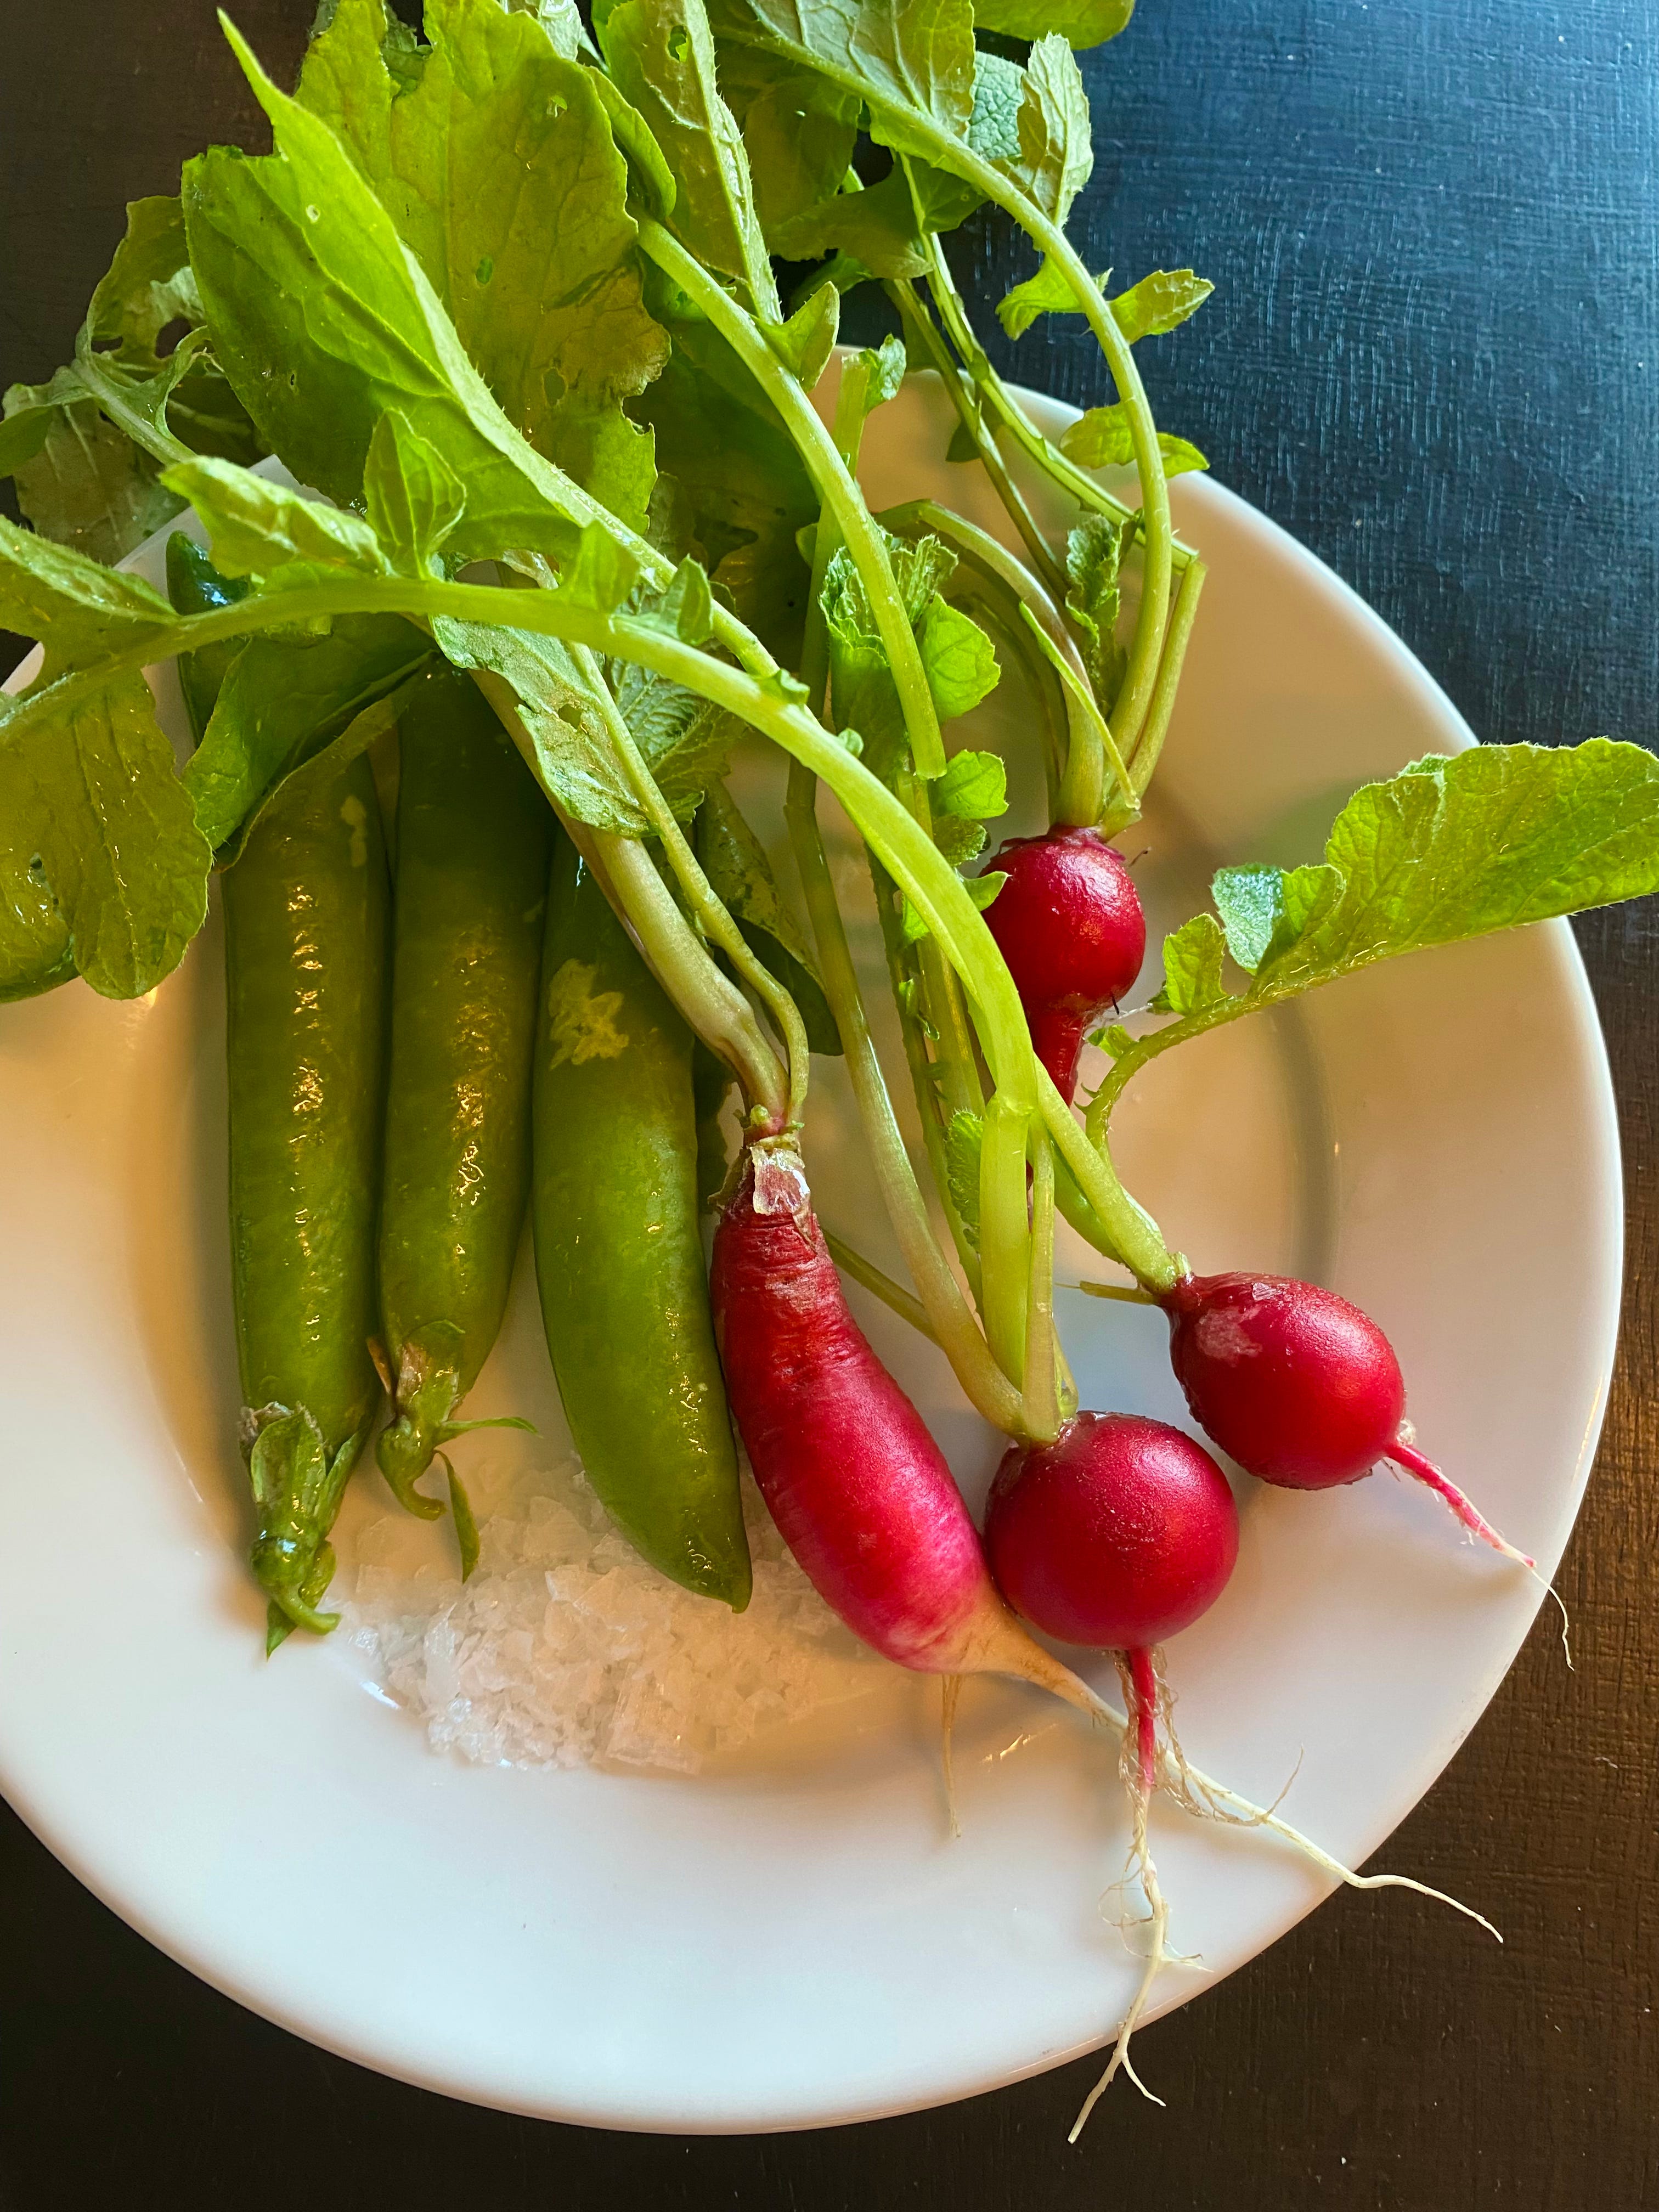
My mum always has a glass dish in the fridge filled with washed and prepped salad-type vegetables and leaves: radishes that have been topped and tailed; cucumbers that have been scrubbed and quartered lengthways; little gem lettuce leaves that have been separated out, washed and spun — you get the idea.
It’s a small but surprisingly transformational act.
Once those salad-y bits are there, in a ready-to-go state, you’ll find yourself snacking on crudites rather than reaching for the crisps — or making a salad for lunch rather than defaulting to pasta.
As we all try to move towards eating more plants, it’s the micro changes — that radish you opportunistically pop into your mouth as you root around the fridge for something else — that can add up…. Said another way: it’s the small wins!
And whilst on the topic of food prep…
These Pyrex dishes are my favourite for meal prep of any kind. Here’s why:
They are glass — so (1) minimal plastic, (2) you can see what’s inside them (no veg left behind!)
They come in a variety of sizes
They stack sturdily in the fridge and nest when stored
They’re both oven-proof (without lids) and freezer-proof
They are robust but lighter than other glass tupperware
The lids fix on securely and their design allows you to fill the containers to the brim (again, unlike other glass tupperware that I’ve come across)
I’ve been using them for years and could not live without them!
HOW TO MAKE SAUERKRAUT, STEP BY STEP
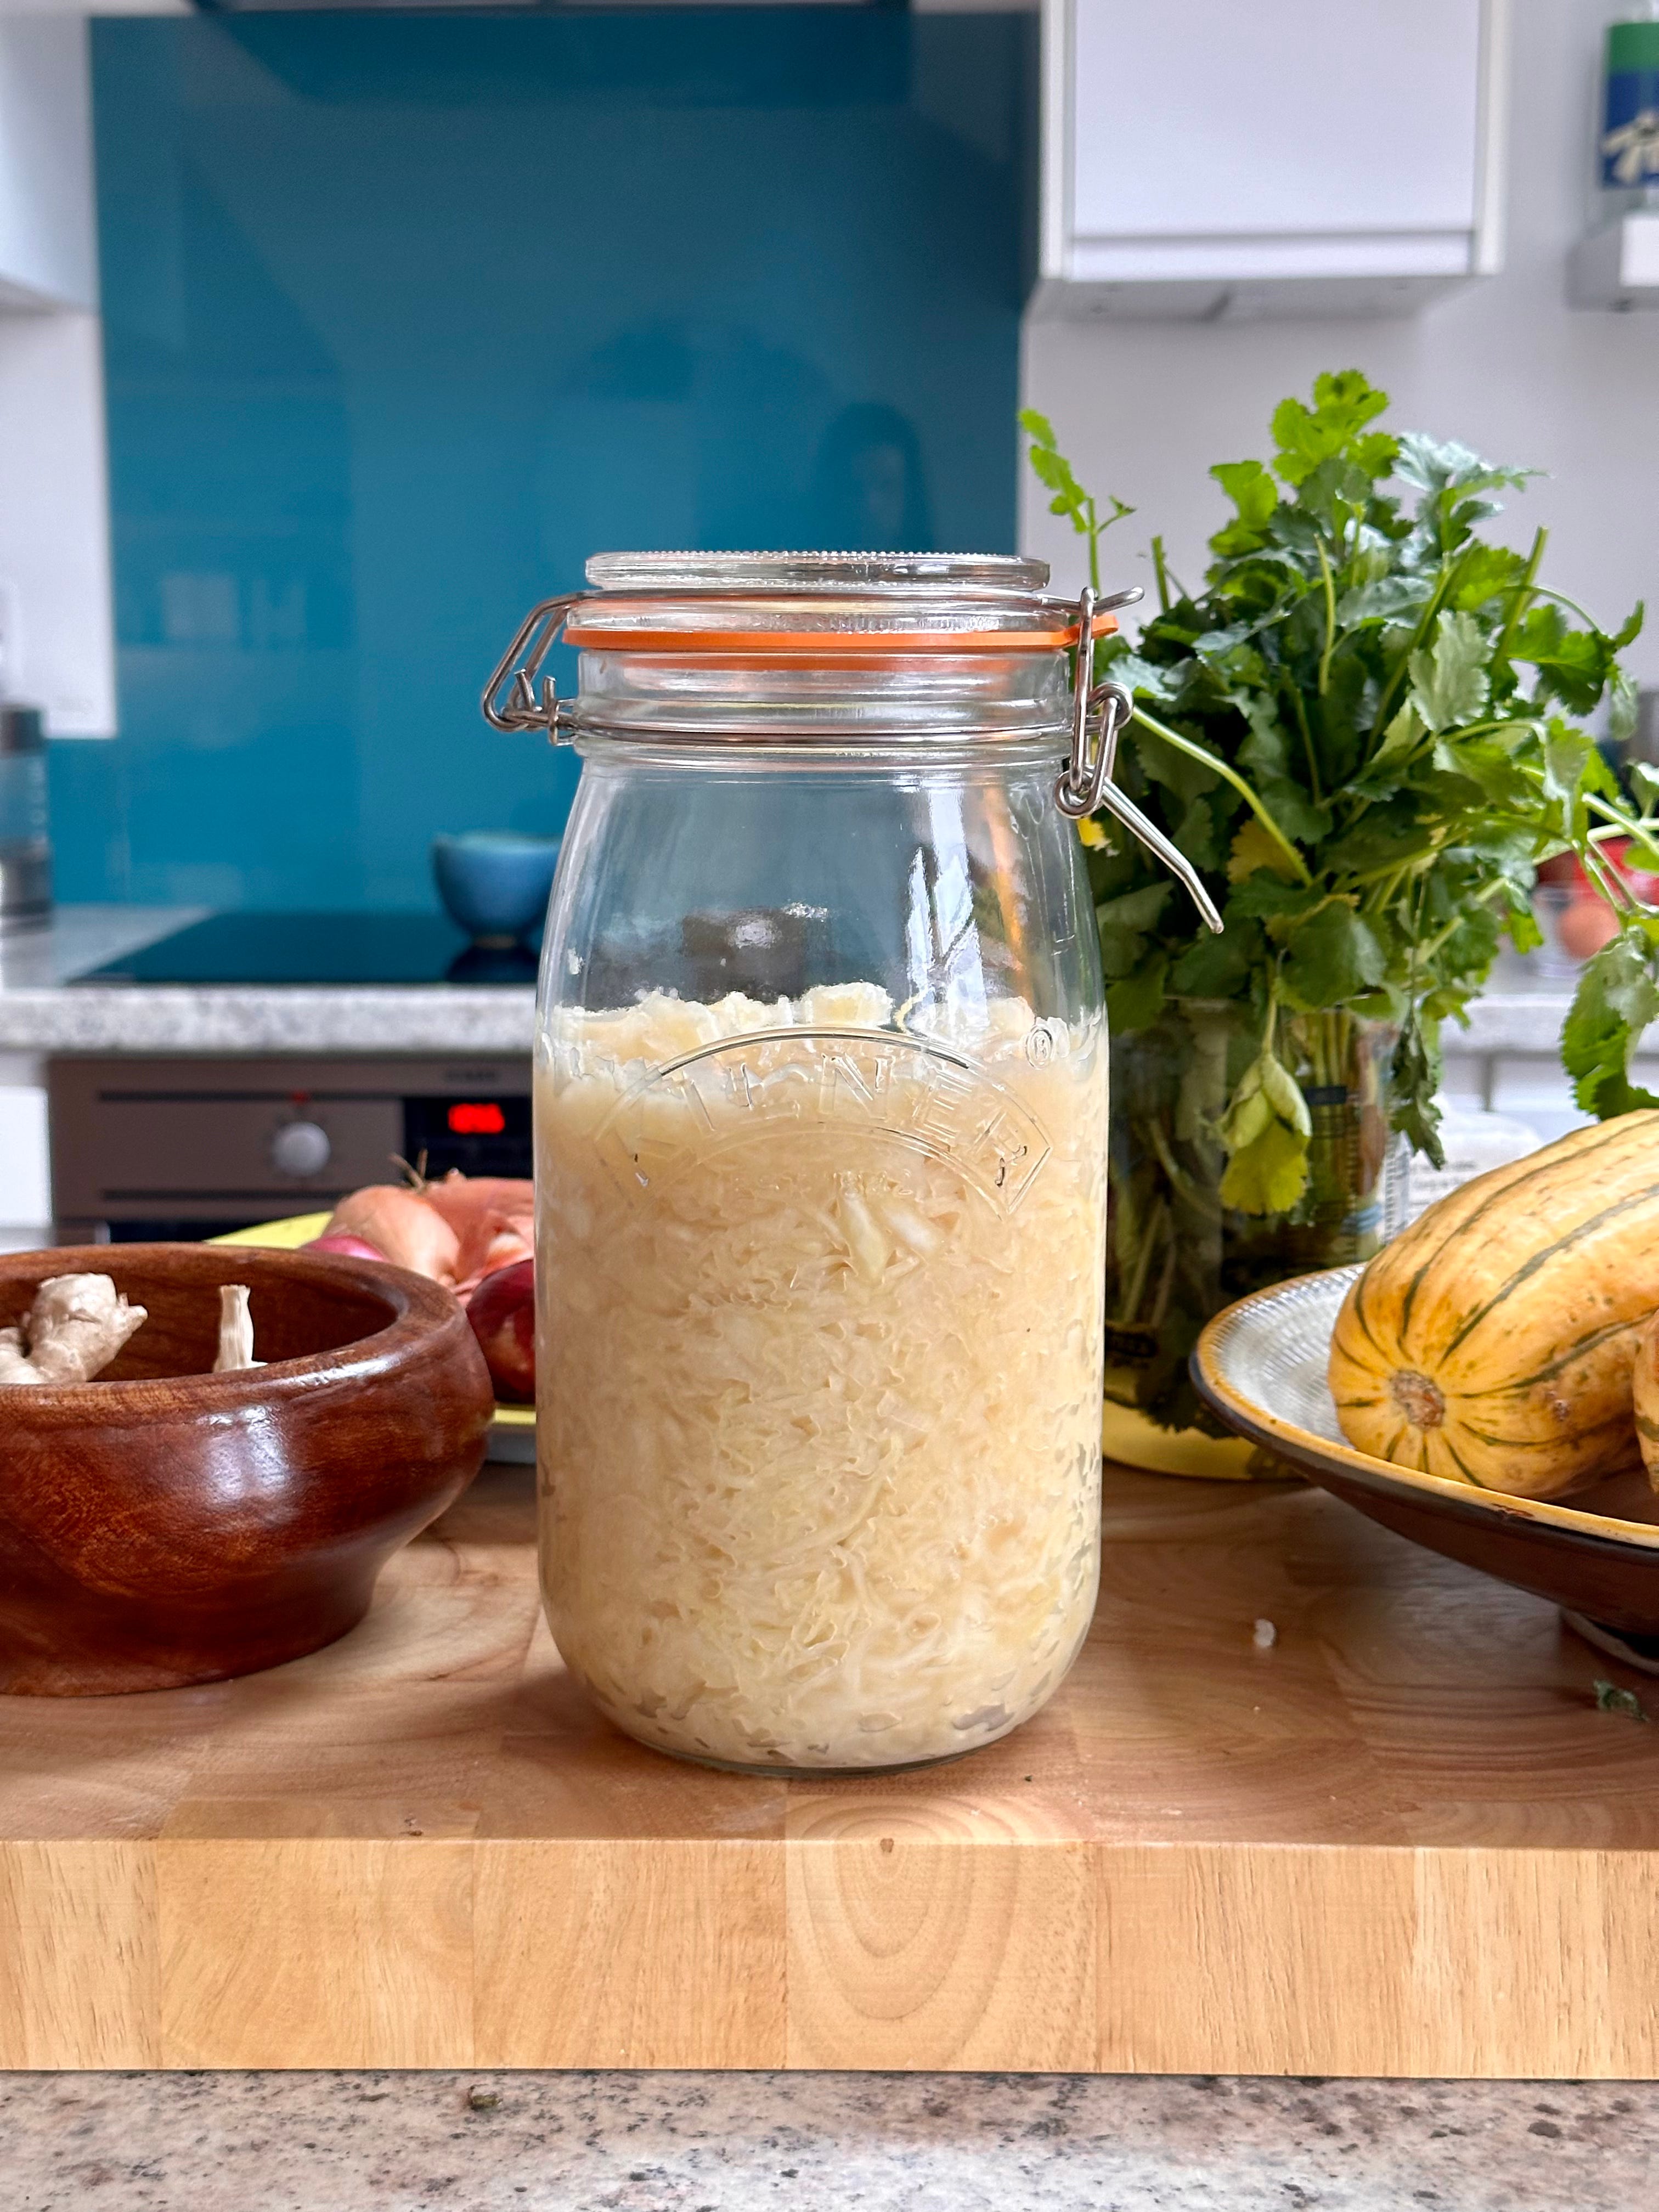
Makes around 1.5kg sauerkraut — you can easily scale down the recipe, if you like
Ingredients
3 standard-sized white cabbages, preferably organic, to yield around 1.3kg prepped weight
Maldon salt (or another flaky salt)
Equipment
1 x 1.5l Kilner jar (or similar)
1 large bowl in a non-reactive material (e.g. glass, stainless steel)
Scales
Mandolin (not essential — you can use a knife — but this is the one that I have and it’s very good)
Microscales (not essential but they are worth getting if you do a lot of precise baking — these are the ones that I have)
Method
Start by making sure everything that you’re about to use (chopping board, knife, bowl, Kilner jar etc.) is CLEAN. This is important because we want good bacteria only in our sauerkraut.
Next, sterilise your jar by placing it in an oven that’s been pre-heated to 140°C/120°C fan/275°F/gas 1 for 15 minutes (make sure to remove the seal first, as you don’t want it to melt!). Turn off the oven and allow it to cool in there whilst you make the sauerkraut.
To make the sauerkraut, remove the outer leaves of the cabbages, then cut off the base. Cut the cabbage into quarters and slice out the cores. Place the cabbage bases and cores aside for later.
Thinly slice your cabbage, either with a knife (bit slower) or a mandolin (bit faster, also a bit riskier). Your choice how thinly to slice your cabbage.
Weigh the prepped cabbage, and then calculate 2% of that weight to give you the amount of salt that you need. For example, for 1000g of prepped white cabbage you would need 20g of Maldon salt.
It’s easy enough to use a calculator for this (1000 x 0.02) but I do it in my head by calculating 1% first, then doubling it
N.b. 1 tbsp Maldon sea salt is around 11g
Add the salt to the cabbage and start to scrunch it with your hand using firm pressing movements (see below). After 5 to 10 minutes of doing this, the cabbage will have lost a lot of volume and liquid will start to appear — this is your brine.

Get your Kilner jar out of the oven (being careful to hold it from the outside, rather than grabbing the rim — we don’t want to incorporate bacteria now that we’ve sterilised it).
Use a metal spoon to start transferring the sauerkraut to the Kilner jar, pressing it down so that the kraut is packed in nice and compactly. Keep going until all of your cabbage is in the jar, making sure to leave a couple of inches space from the top. Make sure to push any stray bits of cabbage down, then pour the remaining brine over the top so that the cabbage is submerged. Trim down the cabbage ends to fit in the jar, then add these to the top of the cabbage and stack them so that when you close the lid, they push the shaved cabbage under the water line.

Place the jar in a cool, dark space for 3 to 4 days, burping it at least once a day (I tend to do it morning and night).
Burping is simply opening the jar and then closing it again, to release any build-up of gas from the fermentation taking place. This is important to avoid any explosions!
Taste the sauerkraut from day 3 onwards (use a clean metal fork) and once you’re happy with how tangy it is remove the cabbage ends and transfer the kraut to the fridge. Once in the fridge, the fermentation process will pause/significantly slow down and, so long as you observe good sauerkraut hygiene, it should last at least a couple of months.
It won’t need regular burping from this point but it’s probably worth opening the jar once a week!
FURTHER READING + RESOURCES
This is the handheld mandoline that I use. I’ve bought cheaper ones (e.g. Oxo) before and they’ve not lasted. I’ve had this one for 4 or 5 years now and it’s still going strong.
Small wins, big bacteria gains! Who knew gut health could be this simple? Just cabbage, salt, and time—no pricey probiotics, no fancy gimmicks, just good old fermentation magic. Plus, making your sauerkraut means you’re officially a scientist and a chef. Talk about a power move for your microbiome!
Thank you so much for sharing the recipe in such detail! I’ve tried fermenting food a few times in the past but didn’t have much success… occasionally it would grow some mould on top and that put me off. Time to try again, I think!