Small Win #8: The best banana bread in the world is... not mine
But I will share it with you. Plus 3 easy ways to upgrade your cakes
Welcome to Small Wins, a newsletter that shares a small win with you every other week — one that has the power to improve your cooking, your home, your life. If you’ve found your way over here but are not yet subscribed, here, let me help you with that:
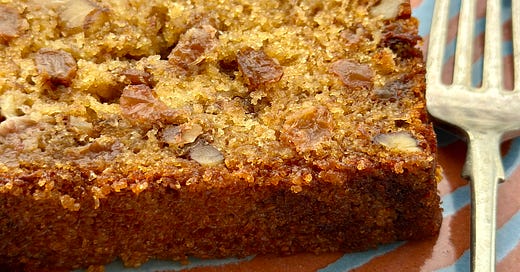
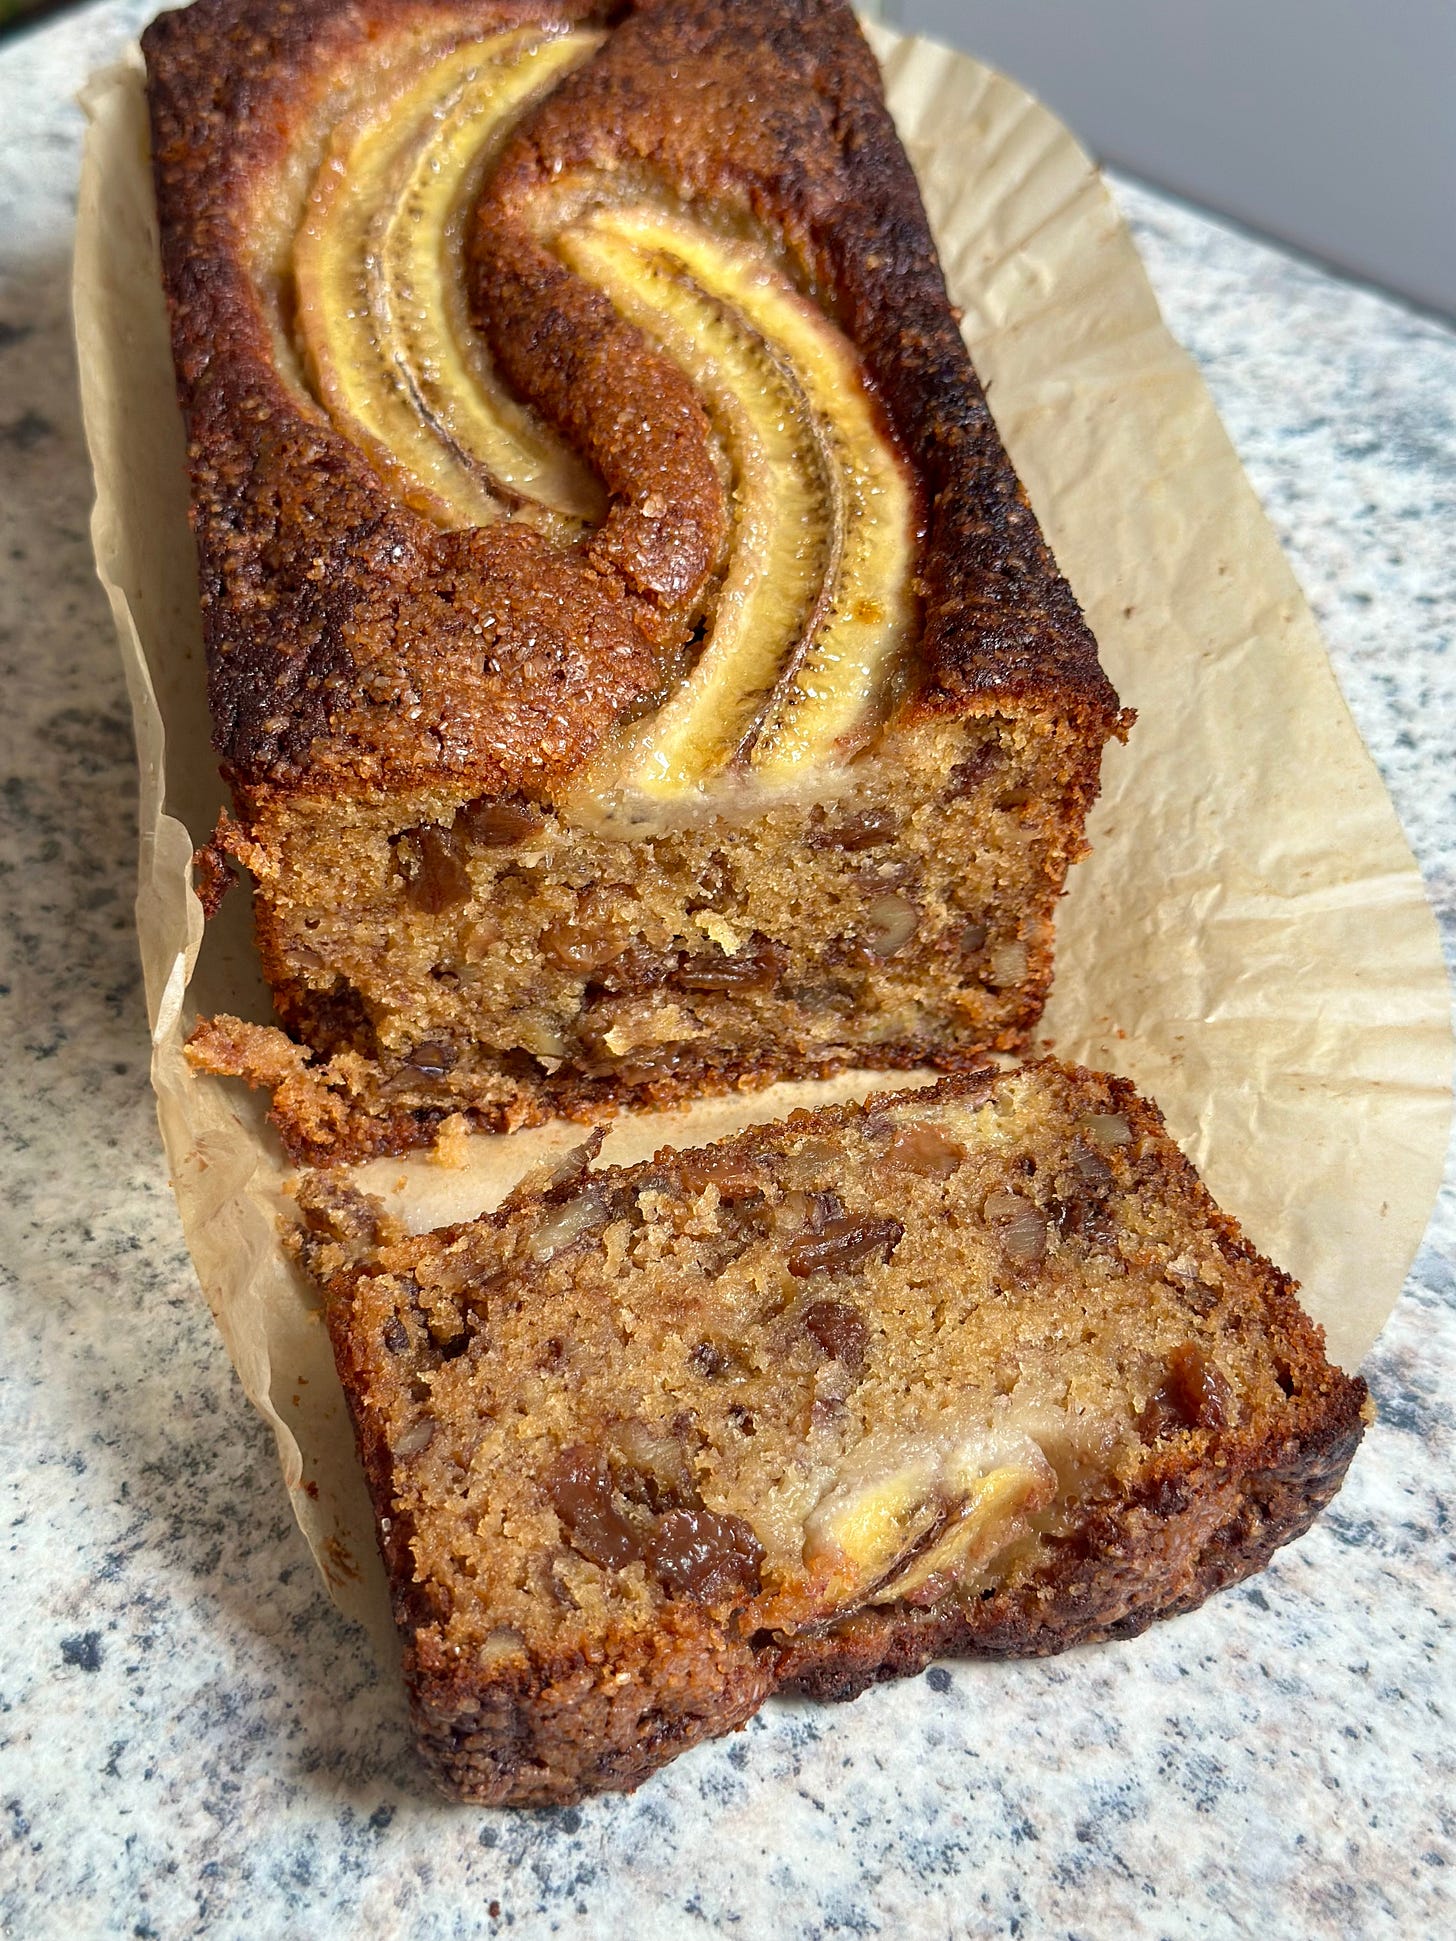
Sorry to break it to you but this is 100% cake. Not bread, not a breakfast food: cake. Perfectly plush, banana-sweet, rum-spiked cake.
At one point I set myself the task of creating the perfect banana bread but I was quickly humbled once I realised that Milli Taylor had already done just that with her BBBB: Brown Butter Banana Bread.
In Milli’s own words: “[It] took me 2.5 years to get it [right]… It might be the best recipe I’ve ever developed and [it] shows what can happen when you spend proper time on something”.
She’s right: it does show — this is a knockout cake. Plus, it’s a recipe that offers an insight into three ways that you can upgrade almost any cake — tips that I hope will embolden you to tweak your favourite recipes!
Love,
Alexina
Coming up on Small Wins — A simple formula for soup, the anatomy of a ragu + the best hot chocolate in the world
For my Small Wins+ community — This month it’s all about potatoes! The potato variety that gives Maris Pipers a run for their money, my 7 tips for the best roast potatoes, perfectly fluffy mash for any occasion + much more. Next month? I’m tackling chicken! Become a paid subscriber to get access.
SPIKE THE CAKE + OTHER UPGRADES
Three things we can learn from Milli’s recipe that will make many cakes better:
Brown the butter
Sprinkle the demerara
Spike the cake
Let’s get into these in more detail.
Brown the butter
This is a step that’s worth considering for any cake or cookie where you want to increase the depth and complexity of flavour. When you brown butter the milk solids become toasted (it’s the Maillard reaction!) and this contributes a caramelised sweetness and subtle umami flavour. It’s a profile that pairs particularly well with autumnal vibes — nuts, chocolate, pumpkin, pears, plums.
Before we get into the practical ‘how’ of using brown butter in cakes, it’s useful to know that butter is roughly 80% fat, 18% water and 2% milk solids, but it also contains a lot of air (which has been uniformly distributed through the churning process).
This means that when you brown butter, two things happen:
The water evaporates off
The air suspended in the butter is released
The implications of this are:
You will need to add that lost moisture back in
You may need to incorporate additional air or lightness into your bake (i.e. via mechanical or chemical leaveners)
Let’s get into how to do this.
If making a recipe that uses melted butter or oil
This is a straight sub. Just make sure that you weigh/measure out your brown butter after it’s cooked. So if a recipe calls for “150g butter, melted” or “150g melted butter”, you’ll want to replace that with 150g of browned butter (not 150g butter, browned). Make sense?
What this means in practice is that you’ll need to start with around 15-20% more butter (i.e. 175/180g), to ensure that you end up with at least 150g of browned butter in the end.
If making a recipe that uses softened butter
Follow the guidelines above, but allow the browned butter to solidify before using — this will enable you to cream together the butter and sugar as you normally would, or rub it into flour when making biscuits/cookies.
You will need to counteract the loss of moisture by adding 1 tbsp of milk or cream for every 120g or so of browned butter. Simply incorporate it at the time that makes the most sense — for a cake, I would fold it through at the end; for biscuits/cookies I might add it at the same time as the eggs.
You may also want to add a touch more baking powder to provide some additional lightness — just be sure to not exceed 7% total baking powder in cakes and 2% total in cookies*.
*These are baker’s percentages, so we’re talking about baking powder as a % of the total flour quantity in the recipe.
Speaking of brown butter! The brilliant
just shared a recipe for Brown Butter Lemonies and was clear that, when testing them, the version with brown butter was the clear winner. it’s true: brown butter makes everything (okay, most things) better .Sprinkle the demerara
This is a fantastically easy way to add a bit of interest and sparkle to rustic cakes (e.g. loaf cakes, cakes with fruit baked into them etc.) or flaky pastry-based treats (e.g. apple pie, eccles cakes, a galette). Demerara sugar doesn’t fully melt in the oven so it creates this crackly texture that adds a bit of dimension. (This is not something to do when making a light sponge to use in a layer cake or a swiss roll. )
Spike the cake
A lot of the best cakes have a slug of alcohol in them: Milli’s banana bread is a case in point, as is this, and this, and this, and the Pineapple, Rum & Liquorice Upside-Down Cake in my cookbook Bitter (p.228 — or feel free to drop me a message and I’ll send it to you!).
Why? Because adding alcohol to cakes has a number of benefits:
It contributes flavour — particularly if you use a spirit like dark rum
It carries other flavours (this is why alcohol is the base of extracts such as vanilla)
It offers additional moisture, resulting in a more plush crumb
It creates additional lift (through the evaporation of that additional liquid)
You shouldn’t add too much alcohol to a cake because it could compromise the structural integrity of the sponge, but you can certainly get away with adding 2 to 3 tbsp to most cake batters. Or if you’re incorporating dried fruit into a cake (e.g. carrot cake), an easy way to incorporate alcohol is to use it to rehydrate the fruit — as Milli does in this banana bread.
Some of my favourite alcohols to add to cakes are:
Rum (great in cakes with fruit)
Bourbon (perfect in a sticky toffee pudding)
Marsala (fabulous in plain cakes)
Amaretto (brilliant in almond-based cakes including frangipane)
Don’t want to add alcohol to your cake?
Adding 2 to 3 tbsp of milk or double cream will give you some of the same benefits in terms of additional moisture and better texture.
That’s it — 3 simple ways to upgrade your cakes! You won’t look back.
THE IMPORTANCE OF AIR

I’ve never seen air listed as an ingredient in baking, but the truth is that it’s fundamental. Many of the mechanical processes in baking are there with the sole intention of trapping and retaining air, for example:
Creaming together butter and sugar
Whipping up whole eggs or egg whites
Additionally, chemical and biological leaveners such as bicarbonate of soda, baking powder and yeast release carbon dioxide in the oven, which assists with the rise.
Why is air important? Because it affects the size, texture and appearance of a finished bake.
Here are some ways to maximise the amount of air that you get into your cake batter:
When making delicate or fine cakes where airiness is important, use caster sugar instead of granulated sugar to create smaller, more stable air pockets. (If making a more everyday/rustic cake where an ultra-light texture isn’t required do, in fact, use granulated sugar on the basis that it’s half the price of caster — every little bit counts in these times, amiright?.)
Cream your butter and sugar together for a really long time — a good 5 to 10 minutes. A classic butter and white sugar mixture should go from a daffodil yellow to a pale lemon yellow (see below). You can also test it by rubbing a small amount of the batter between your fingers: it should go from feeling quite grainy to only a little grainy (essentially, the sugar should be dissolving).
When creaming butter and sugar together, or whipping up eggs, take your time: start your mixer on low and gradually increase the speed rather than starting fast straightaway. This creates a more stable structure of air pockets.
Sift your flour to incorporate additional air. Every little helps!
Be gentle: stir / fold batters with a light touch and add mix-ins such as dried fruits and nuts with care rather than dumping them into the bowl.
In Milli’s BBBB, air is crucially important because there are a lot of wet and heavy ingredients that could easily weigh it down — the rum-soaked sultanas, the bananas, the browned butter. That’s why this cake requires both mechanical leavening (in the form of whipping the eggs and sugar together) and chemical leavening (in the form of self-raising flour and bicarbonate of soda).
A chemical leaveners flashcard
Bicarbonate of soda = Sodium bicarbonate
Single action leavener
Activated when combined with a wet acid (e.g. ingredients like buttermilk or yoghurt)
Must have something to react with otherwise it will leave a soapy flavour in your bake
Baking powder = Sodium bicarbonate + cream of tartar (a dry acid)
Double action leavener
Activated both when it comes into contact with liquid and when it comes into contact with heat (i.e. in the oven)
Contains both sodium bicarbonate and the acid in perfect balance, so doesn’t require additional acidity to be added to the cake batter
Self-raising flour = plain flour with baking powder already incorporated
If a recipe calls for self-raising flour and you don’t have any, you can easily substitute it with a combination of plain flour and baking powder (1 tsp to every 140g plain flour)
Some recipes will require a high proportion of chemical leavening and so may specify the use of self raising flour and additional baking powder and/or bicarb
MILLI TAYLOR’S BROWN BUTTER BANANA BREAD
This is truly delicious. It’s a bit more involved than your average banana bread recipe, requiring you to soak the sultanas in advance and brown the butter. Is the extra effort worth it? It’s a resounding yes from me.
I’ve made a few tiny changes:
Milli’s recipe has you butter the loaf tin and coat all of it in Demerara so that you get crunch on every side. And whilst I absolutely love that, what I love slightly more is an easy washing up job — so I use loaf tin liners and settle for popping the Demerara across the bottom and on the top (my quantity of demerara is slightly lower as a result).
I typically leave the toasted milk solids in the browned butter rather than straining them out because (1) it’s extra flavour and (2) it’s one less step. (The only exception is when I’ve taken the brown butter a bit too far and the milk solids are verging on burnt — which was the case this time around.)
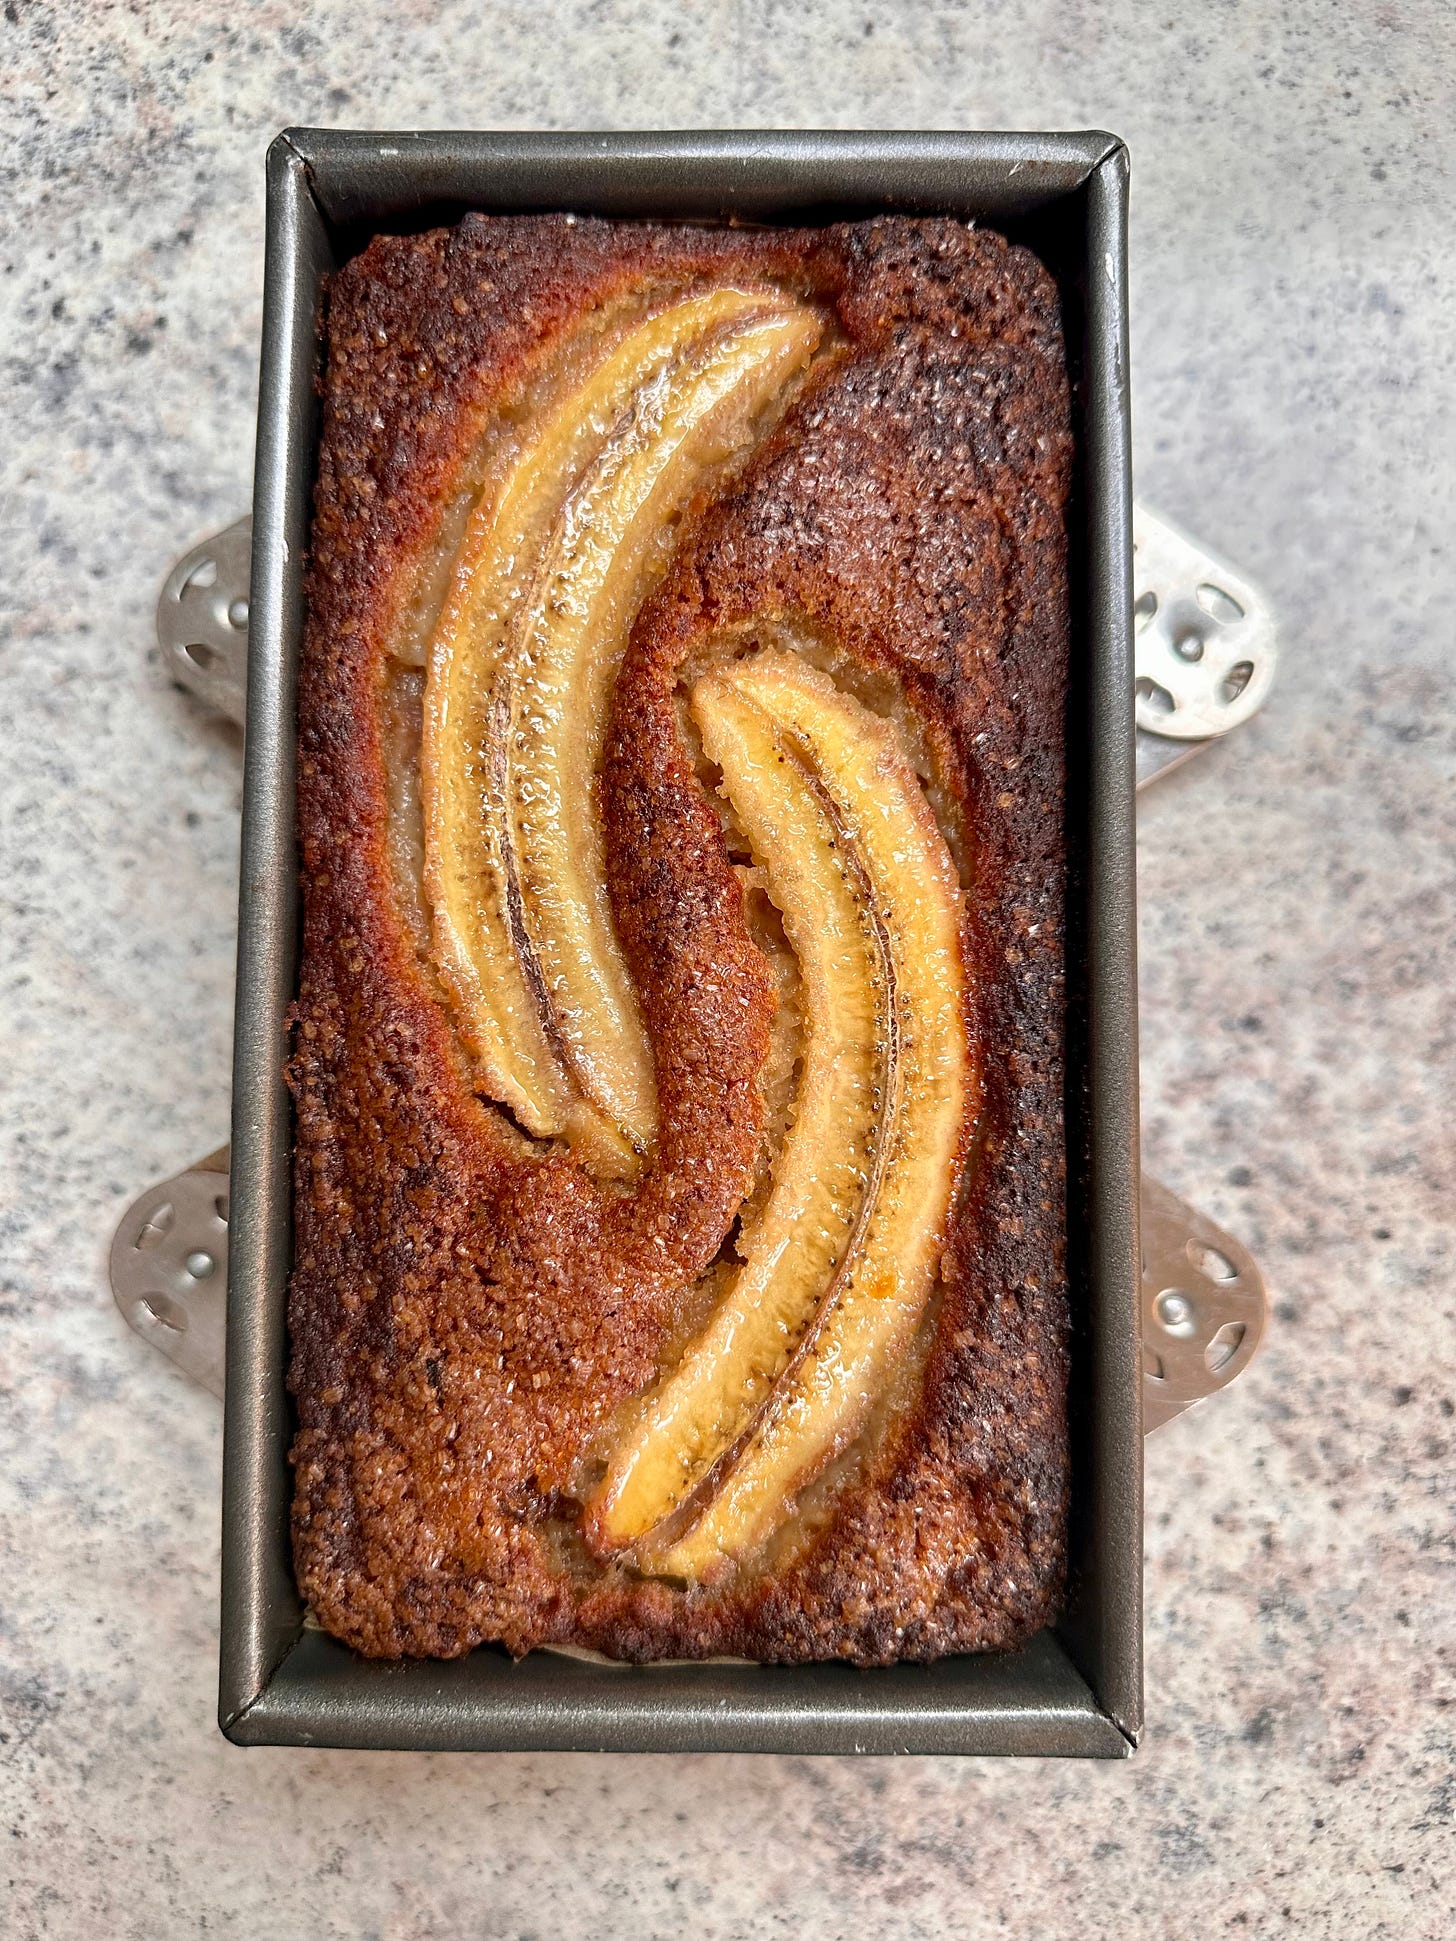
I add a halved banana to the top because: pretty!
Ingredients
100g sultanas, soaked in 150ml dark rum overnight* — Milli recommends Mount Gay rum and I concur
180g unsalted butter
2 medium eggs
100g light muscovado (or soft light brown) sugar
2 large overripe, black bananas, peeled and mashed with a fork
150g self-raising flour
2 heaped tsp baking powder
80g walnuts, roughly chopped
*If you forgot to soak the fruit overnight simply add it to a small saucepan with the rum and simmer for 3 to 5 minutes until most or all of the rum has been absorbed.
To garnish
1 medium ripe banana
2 tbsp demerara sugar
Equipment
2lb/900g loaf tin
Method
Preheat the oven to 180°C/160°fan/350°F/gas 4. Insert a loaf tin liner in the tin (alternatively grease it throughly with butter) and sprinkle the base with 1 tbsp of the Demerara.
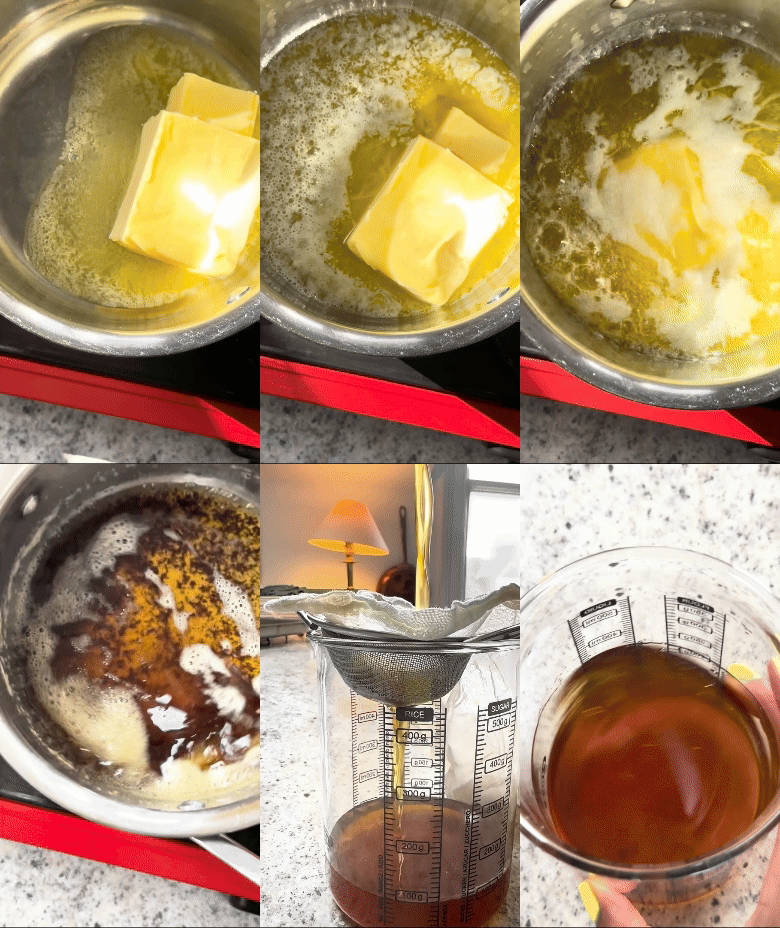
Next brown the butter. Start off on a low-medium heat, allowing the butter to melt slowly, before turning the heat up to medium. The butter should simmer away gently, with the bubbles initially getting bigger and the top of the butter getting quite foamy, before both subside. Once the butter starts to turn golden watch it like a hawk because it can go from fine to burnt in seconds. You have two options for how far to take it: you can either push it pretty far, until the milk solids are almost burnt, and then strain them out (as seen below) — or you can take the brown butter less far but leave the milk solids in. Overall the process should take around 10 minutes.
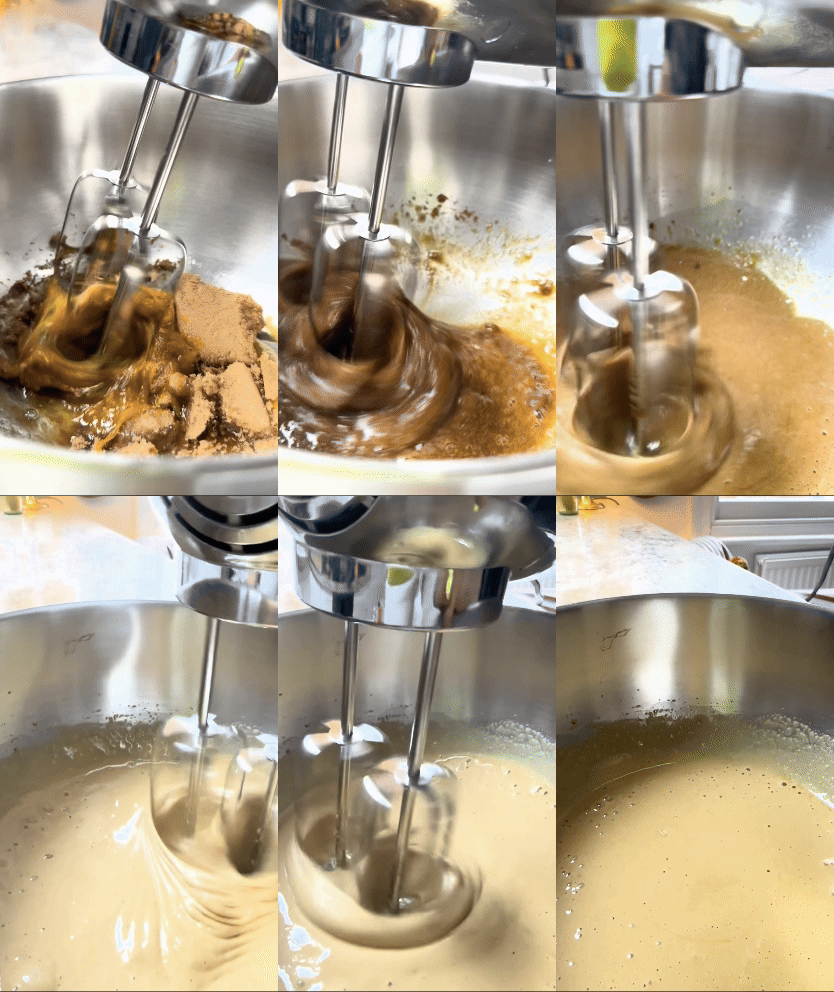
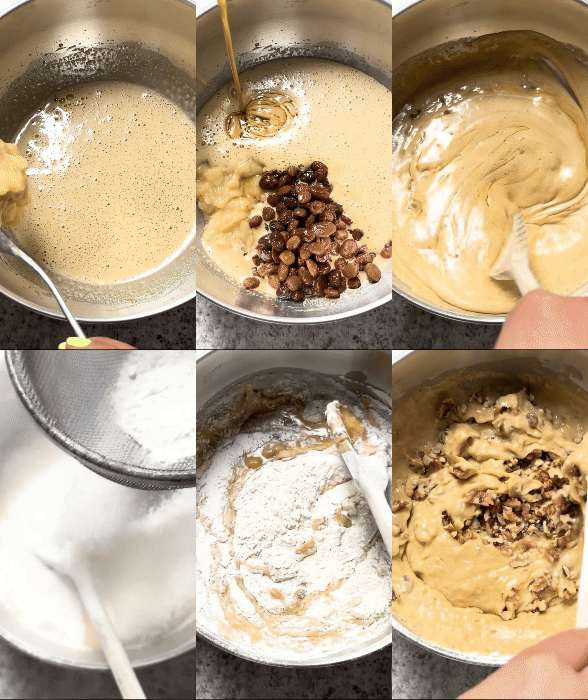
In a large bowl, beat the eggs and sugar together using an electric hand whisk (I prefer using an electric hand whisk over a stand mixer as it’s more nimble and gets around the whole bowl). Whisk for a really long time — like 5-10 minutes — until the mixture turns pale, thick and airy. Just take a look at how much the colour changes:
Gently add the mashed bananas, sultanas (with any residual rum), cooled butter and salt. Gently fold through until combined. Sift in the flour and baking powder then fold into the mixture just until combined. Finally, fold in the chopped walnuts.
Transfer the batter to the prepared tin and arrange the two banana halves on top, sprinkling over the remaining 1 tbsp of demerara sugar. Transfer to the oven and bake until golden brown and a skewer inserted into the centre of the cake comes out clean, between 45 and 60 minutes — in my oven it takes 55 minutes. (If the top is getting dark quite quickly, simply cover the cake loosely with tin foil — I do this at the 40-minute mark.) Allow the cake to cool in its tin for 10 minutes before turning it out onto a wire rack to cool fully.
Storage
This cake keeps really well for up to 3 days (but good luck with that).
Variations
Halve the recipe and use a 1lb loaf tin.
Milli says that the sultanas can be replaced with raisins or dates — I suspect this might tip the cake into too sweet for me, but I’m sharing this information anyway in case it’s useful to someone!
FOOTNOTE: BANANA BREAD FOR ADULTS
I can’t talk about banana bread and not give a little honorary mention to the Coffee Pecan Banana Bread in Bitter (p.190), which one reader said this about:
“I've tried so many other recipes [for banana bread] over the years but none are as good as Nigella's — until this one! It's different and will definitely appeal more to adults than kids, which I think is a good thing.”
This banana bread ticks a lot of boxes: it’s delicious, very quick to make and it uses oil instead of butter, which makes it dairy-free.
Most importantly, the spike of coffee balances out the sweetness of the bananas — so it’s perfect for those who don’t have a crazy sweet tooth. Said another way: it’s banana bread for adults.
If anyone wants the recipe, simply comment below (or drop me an email) and I’ll send it across.
FURTHER READING + RESOURCES
Underripe bananas? You’ll have to exert some patience, but to speed up the process enclose them in a paper bag. Bananas release ethylene gas as they ripen, and the higher the concentration, the faster the process takes place.
Please never waste another moment of your life lining cake tins: get yourself some loaf tin liners, these parchment circles for your sandwich tins (8”/20cm, 9”/23cm or the mixed pack) and these parchment squares for your brownie tin (8”/20cm).
A tip from the brilliant Holly Cochrane, who styled my second cookbook Sweet (coming Feb 2025!) and who founded micro bakery Taymount Bakery during lockdown: the best, chunkiest demerara sugar is found in the coffee aisle at the supermarket.
For anyone interested in learning more about how baking leaveners work and to see how they affect a bake, it’s worth giving
’s excellent post ‘A Lesson in Cookies’ a read.Random, but banana-related: if you like Scrabble, you’ll love Bananagrams! Perfect for when you’re looking for a game that’s similar but also quicker to complete and which has a bit more pace.






Great read! I would love the coffee banana cake recipe please! Also I’m not 100% but I’ve seen people putting bananas in the oven to ripen them quickly!
Currently looking over at my banana stand and wondering how long it will take for them to ripen. Will have to add paper bags to my shopping list 🤣